Combine Audio Tracks
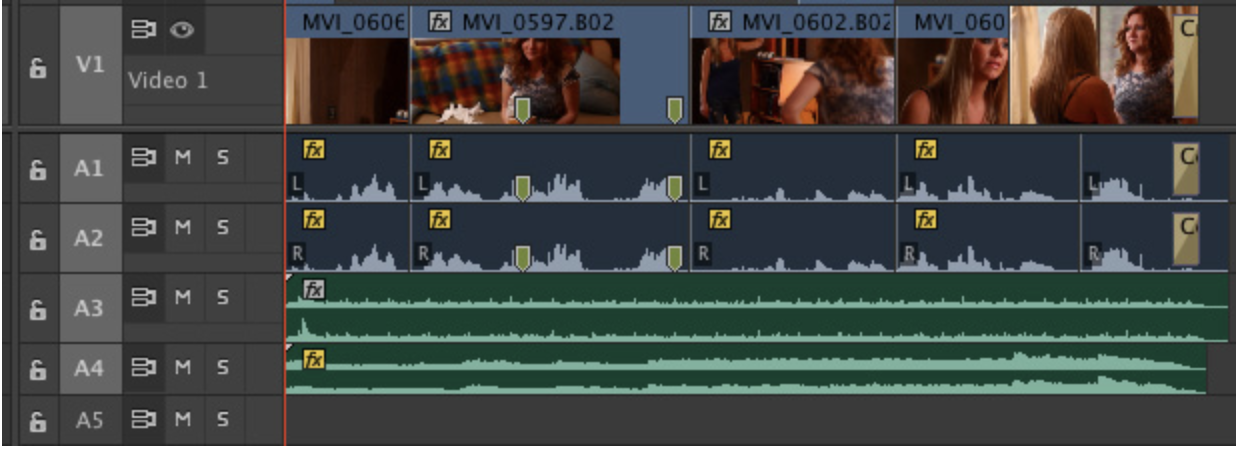
Here’s a short dramatic scene containing the following:
-
- 2 video tracks (Main action and B-roll)
-
- 2 mono dialog tracks
-
- Stereo sound effects track
- Stereo music track
The first thing we need to do is combine all the dialog tracks into one submix so that we can apply a single effect to control all our dialog. (This audio submix is often called a “bus” because it carries audio from a variety of origins to a single destination.)
NOTE: There is no limit to the number of buses you can create and, creatively, you may want to create a bus for all male voices, and a second bus for all female voices. I’m keeping this example fairly simple to make the technique more understandable.
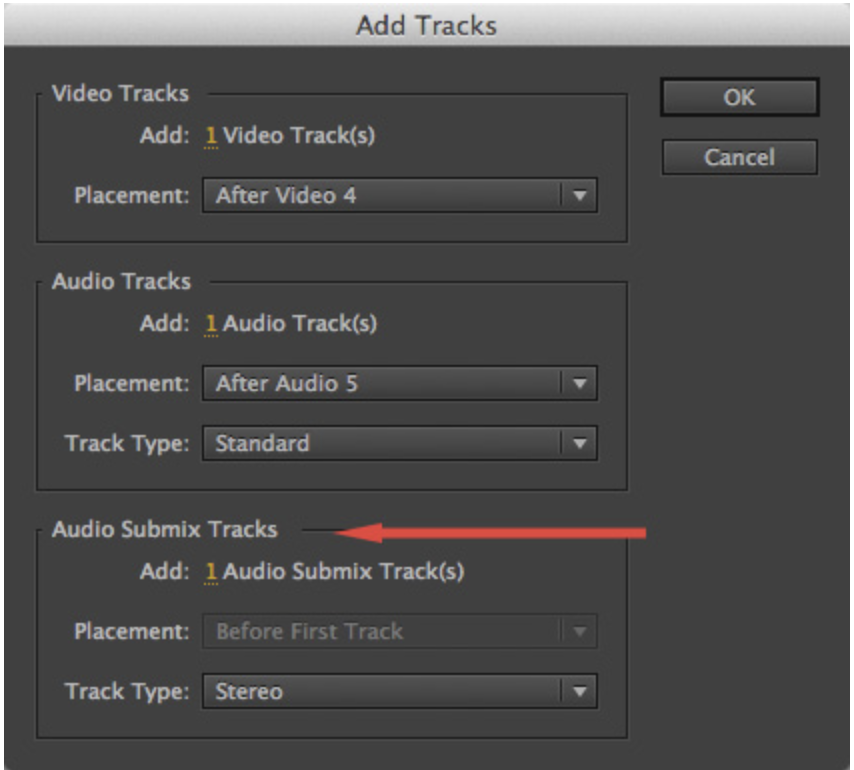
With the Timeline pane selected, choose Sequence > Add Tracks > Audio Submix. In this case, we’ll just add one track and leave the rest of the settings at their default.
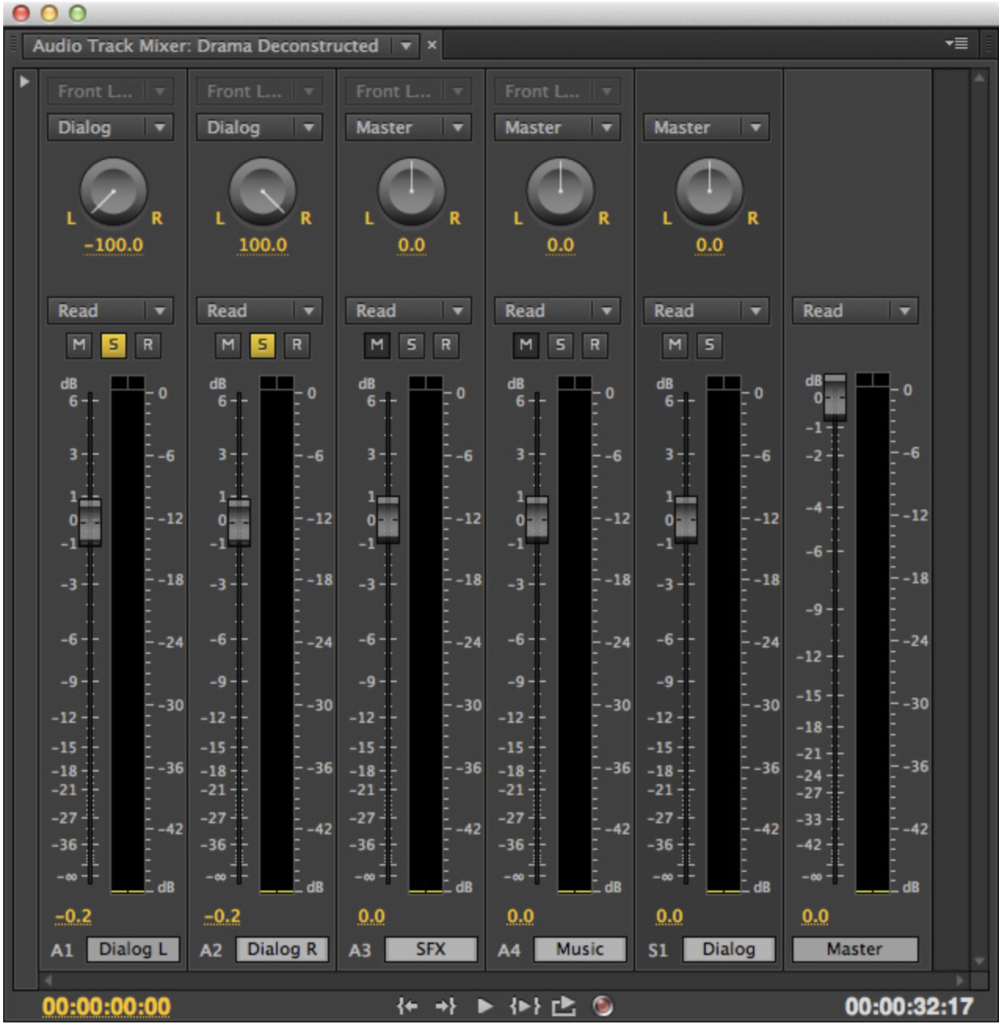 From the Window menu, choose Audio Track Mixer. This displays the mixer built into Premiere. Notice the names of the tracks along the bottom. To name a track, double-click the text and add the name you want; which is what I did here:
-
- Dialog L. Dialog from one camera channel.
-
- Dialog R. Dialog from the other camera channel.
-
- SFX. Stereo sound effects clips.
-
- Music. Stereo music clips.
-
- Dialog. What will become a channel containing all dialog from all tracks – this is the submix track we just created
- Master. The master audio output of the project.
NOTE: If you only have one dialog track in your project, or just one narrator, you can skip this Audio Submix section and go right to applying the filter onto the single dialog track. Submixes are only needed when you need to combine audio from more than one track.
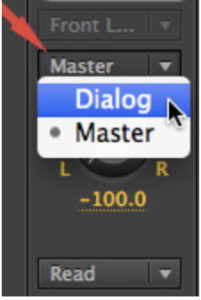
To send the entire output of a track, after the fader, to a submix, click the “Master” popup menu and change it to the name of the Audio Submix channel.
Set this channel Master popup menu to Dialog for both Dialog L and Dialog R tracks.
Click the “S” (for “Solo“) button at the top of the two dialog tracks so that you can hear them, but no other tracks. You have now “ganged,” or “grouped,” all similar audio so that it flows though a single channel, the submix channel called “Dialog.”
Applying the Filter
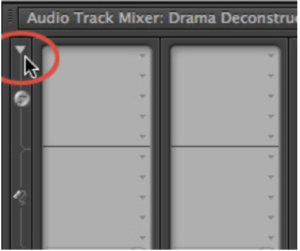
If the effect section at the top of the mixer is not showing, it’s a series of light gray boxes, click the small white arrow in the top left corner of the mixer to reveal it.
These gray boxes are divided into two sections:
-
- Effects. Above the dark horizontal line is where you apply effects.
- Sends. Below the line is where you apply sends. We are ignoring sends for this article.
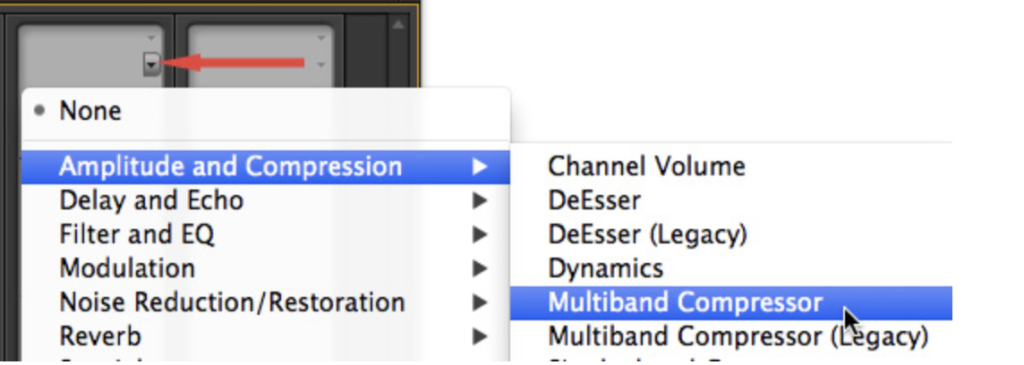
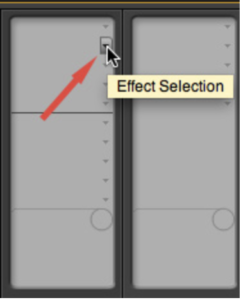
Click the small dot on the right of the Effects section at the top of the Dialog channel and choose: Amplitude and Compression > Multiband Compressor. (To remove an effect, set this to “None.”)
This applies the effect to the Dialog submix.
The name of the effect now appears at the top of the Effects section.
NOTE: You can apply an effect to any of the five slots at the top of each channel. Empty slots are not a problem. However, effects process from top to bottom, so if you are applying multiple effects, the Multiband Compressor MUST ALWAYS BE at the bottom of the stack. Otherwise, you potentially lose its ability to prevent distortion.
Adjusting the Filter
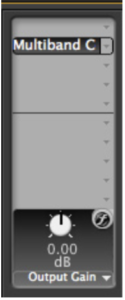
 To display the filter so we can make changes, double-click the phrase “Multiband C” at the top of the Dialog channel strip. (I will confess that the first time I saw this effect, I panicked. However, there are only three adjustments you need to make to this effect for dialog.)
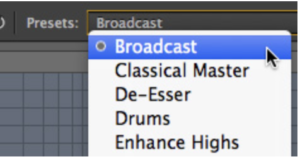
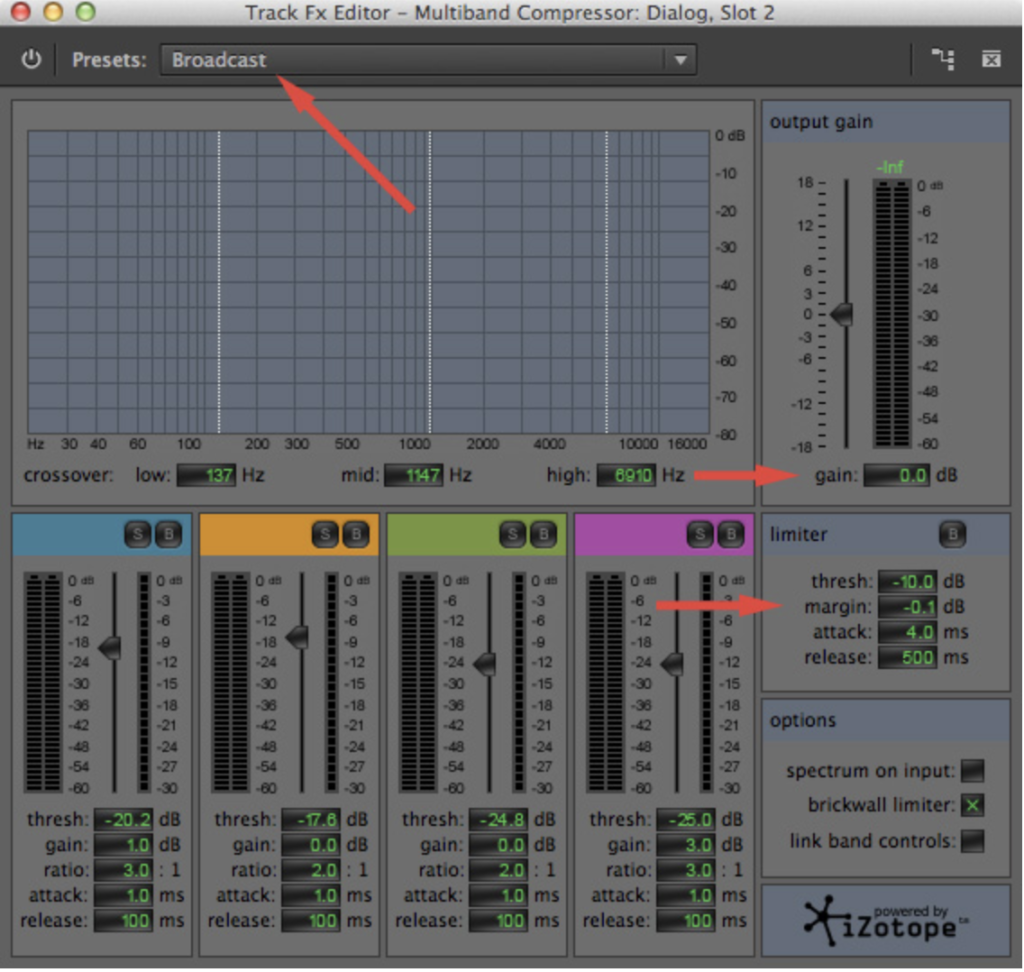
First, make sure the Preset is set to “Broadcast.” This is the default setting and sets all the green numbers in the filter.
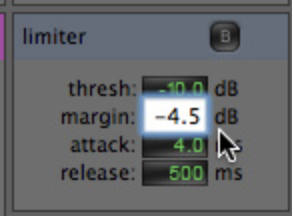
Second, in the Limiter section, set the Margin to:
-
- -3 dB if you are only mixing human speech with no effects or music.
- -4.5 dB if you are mixing speech with sound effects and music.
Mixing to -3 dB makes your narration louder because it doesn’t need to combine with any other audio elements.
Mixing to -4.5 dB leaves room for other audio in the project to be heard without running the risk of exceeding 0 dB and distorting.
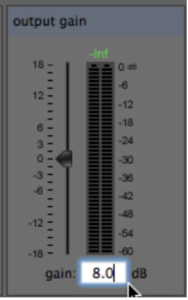
Third, if the dialog audio is very low, increase the Gain (in the Output Gain section) until the audio meters are bouncing above -6 dB and the audio sounds good. There is no specific value to enter. Adjust and watch the meters.
NOTE: One of the benefits to using the Limiter effect in Final Cut Pro X is that it provides visual feedback to help you adjust the effect properly.
Making Level Adjustments
Keep in mind that most of your audio should sound a lot better as soon as you add the effect. However, for those clips that need extra attention, there are several places you can adjust audio levels.
The first is the Dialog submix channel. However, it is considered good practice to leave the submix channel set to 0 dB and, instead, adjust individual elements.
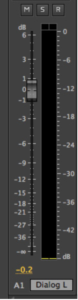
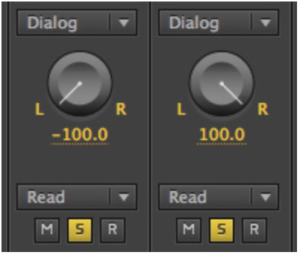
For example, you can adjust the individual channel slider for each track. The numbers on the left indicate the amount of change you are making to the clip. The numbers on the right indicate the absolute audio level of the audio in that track. (Think of the right-side numbers as audio meters just for that track.)
NOTE: Remember to turn off the yellow Solo button when you want to hear audio from all tracks.
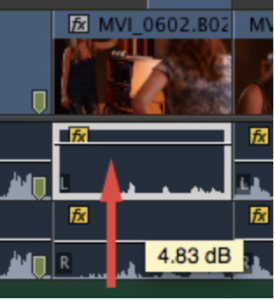
Or, go back to a specific clip in the Timeline and adjust the volume line.
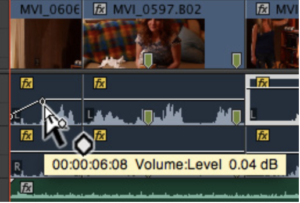
Or, add keyframes within the clip to make precise adjustments.
For the purposes of exporting, an audio submix track acts like any other audio track.
MEASURING LOUDNESS
A benefit to mixing audio in Premiere (and Audition) is that both contain a built-in effect called the “Loudness Radar.”
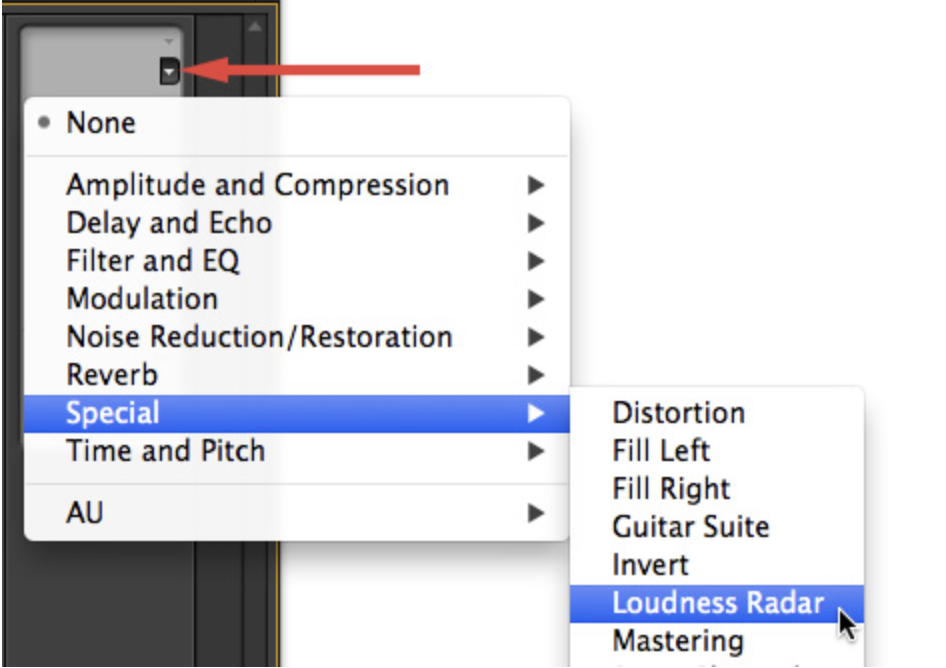
To apply it, go to the Master track in the Mixer, and add: Special > Loudness Radar.
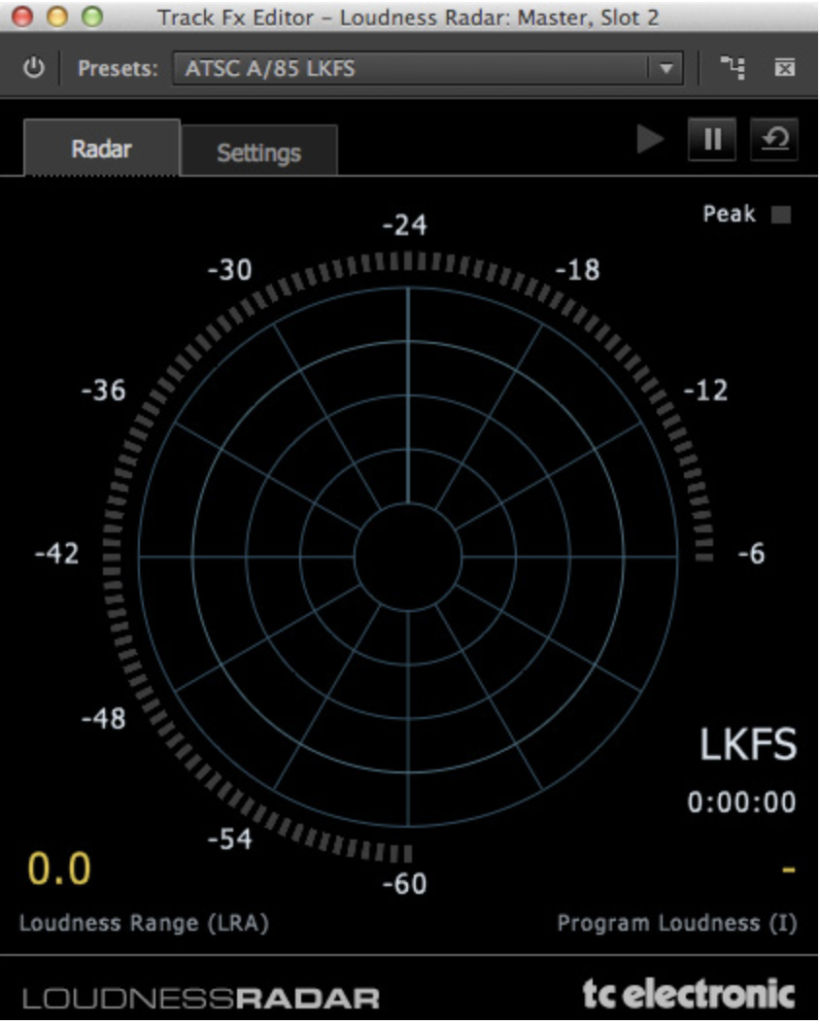
This measures loudness over time. To see the loudness of your project, play the Timeline and watch the meter.

The basic goal, as I understand it, is to get the LKFS reading to hover around -24; it is displayed in the lower right corner of the display.
The polar chart displays average levels over time. Again, the goal is to get the audio to be close to the second-largest circle. Here, for example, everything looks pretty good, except for a spike that reaches out to the outer edge. To fix that, I would go back to the individual clip and tweak the level.
Summary
The audio mixing capability inside Premiere is really very nice. I like the ability to create sub-mixes and, given all the regulations surrounding audio levels these days, I’m very impressed with the Loudness Radar.
However, the big benefit to using these effects is that they take the worry out of getting your audio to sound good. The Multiband Compressor boosts soft audio and corrals excessive audio, all while guarding against distortion.
It will take a bit of time to get comfortable using these filters, but I guarantee that your projects will be better for it.
TAKEN FROM: WWW.LARRYJORDAN.COM