
Captions are simply text over video. You can create closed or open captions, the main difference being that viewers can turn off closed captions, while open captions are always on screen.
You can use these steps to insert subtitles in different languages or captions for the hearing impaired.
Let’s take a look at how to add captions in Adobe Premiere Pro with a few simple steps.
Step 1: Create a New Caption File

Click the New Item button at the bottom of the Project Panel and select Captions. The new caption file will be a video file, and the settings will match with the current sequence you have open.
In this tutorial we will work with open captions, but you can choose closed captions, ex. CEA-608 CC1, but you will be limited to a certain type of font and style.
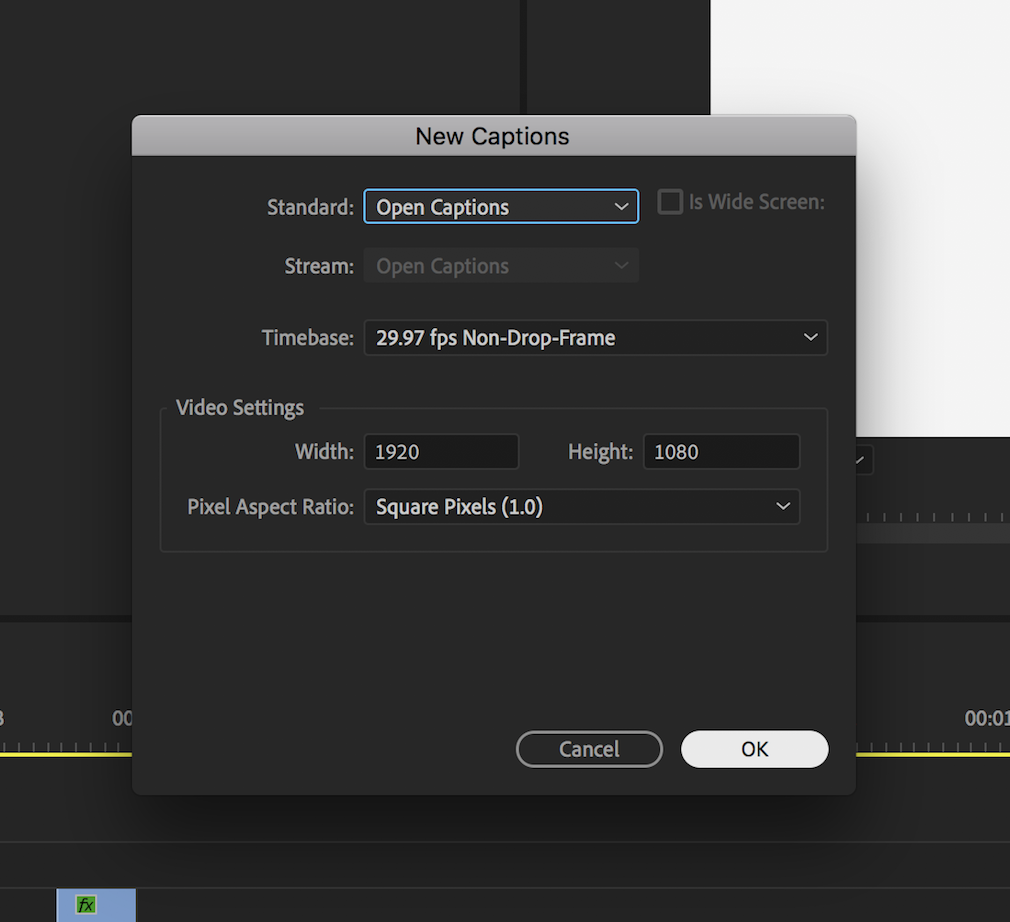
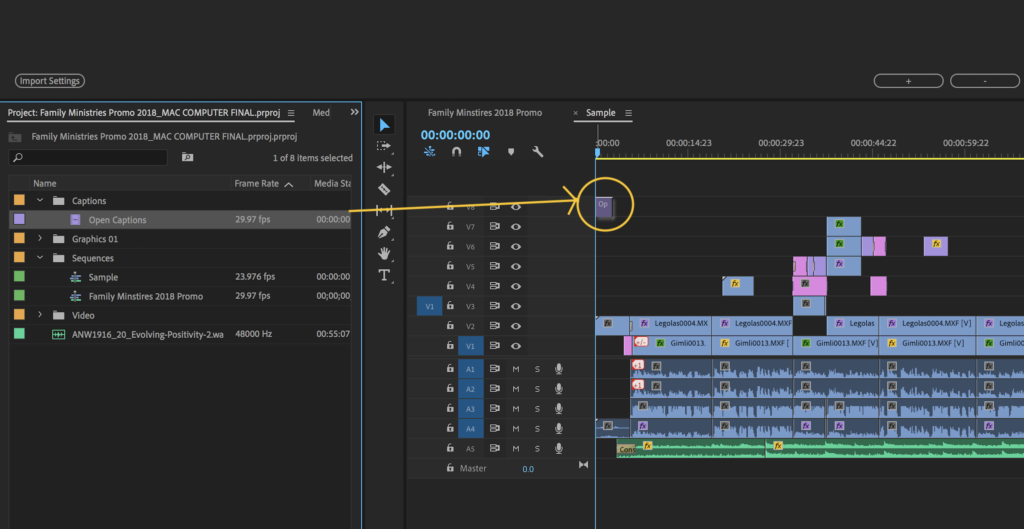
Select the correct caption type. Drag the Caption video file onto the timeline.
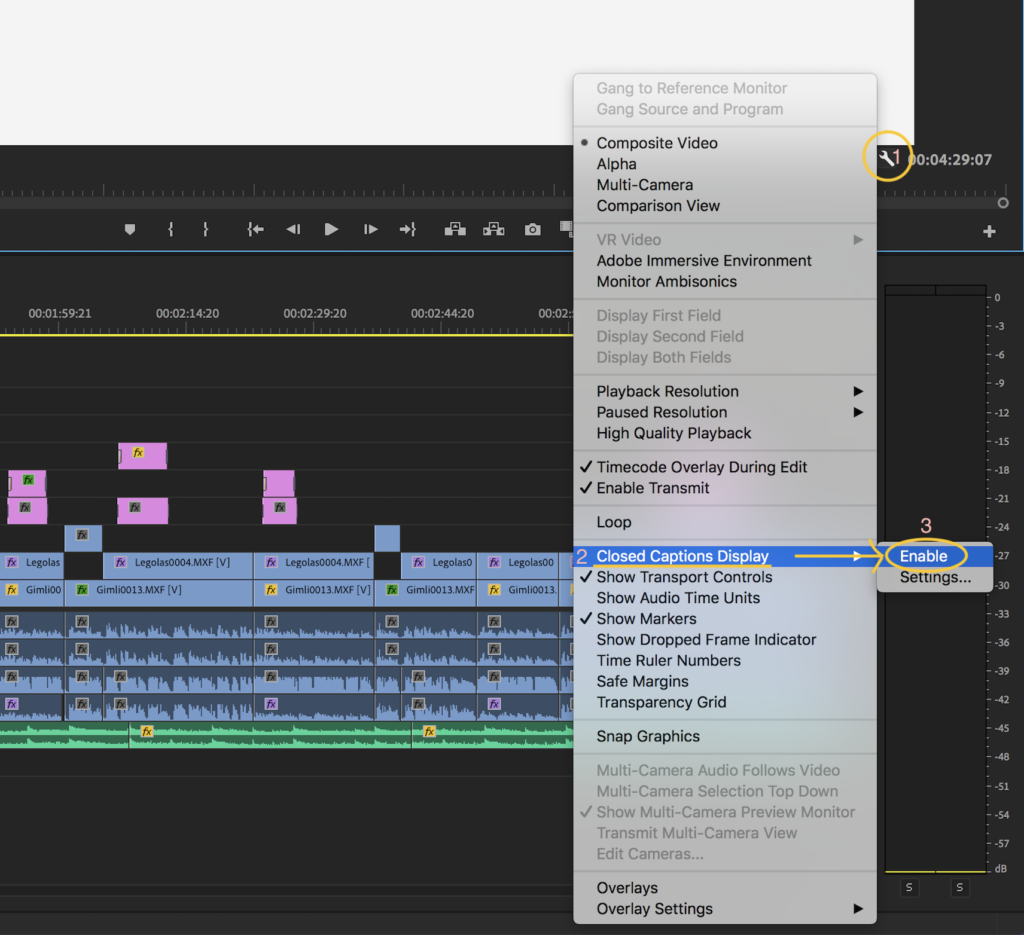
*Be sure to Enable the Closed Captions Display in the Program Monitor.
Click on Settings below the program monitor and drag over Closed Captions Display and select Enable.
Step 2: Adding, Timing, and Formatting Your Captions
Select the Caption file and use the Caption Panel to add text, time, or to format your text. If you can’t see the Caption Panel, simply go to the window menu, and select Captions.
Click the Plus button to add a new text box. Type the caption you want in the box and keep adding more boxes, adding more captions. Make sure your In and Out points match up with the spoken word.

You can view the captions you create in the timeline by expanding the video track on your timeline. Simply drag out the purple captions video track. The black in and out points on the captions video track are your captions you have created. They will be separated by each caption box you have created. You can drag them out and move them around according to their times as well. In addition, with open captions, you have a few extra options, such as additional fonts and size adjustments.

Step 3: Export
In the Export Settings dialog box, use the Caption tab to export the captions as Burn-in or as a Sidecarfile. A Burn-in will naturally “burn” the captions into the video file, and viewers will not have the option to turn them off. When you export as a Sidecar file, you will be provided with an additional .scc file which you can upload or deliver with your video files.

If you worked with “closed captions”, ex. CEA-608 CC1, you do have the option to export as a sidecar file.

Fin